
Cutting slots in nuts used to be one of the operations I feared the most. Most of the books tell you to cut the slot a little at a time, with a few strokes of the nut file, You cut a little bit, re-fit the string, measure the clearance, unmount the string, cut a little bit, re-fit the string, and so on until one of two things happen:
The second situation bit me in the butt with just about every nut I ever made, until I heard about a method that was fairly foolproof. It utilized a set of common feeler gauges. They don't have to be good ones ... I picked up a set for a couple of dollars at a used-tool emporium here in town.
Your first step involves a little math. You find out the height, or crown, of the first fret, either by pressing a small straight-edge across the first couple of frets and figuring out which feeler blades just fit between the straight-edge and the fretboard, or by using a caliper that has one of those little rods that let you measure depth. You can also get a fancy-schmancy caliper from Stewart-MacDonald for fifty-one bucks that measures it perfectly, but where's the fun in that? For our example, let's say the crown of the fret is 0.045"
Next, you determine the desired string height at the first fret. The time-tested ways of doing this are: looking it up in a book, copying an existing instrument whose action you like, or starting conservative and sneaking up on it a wee bit at a time. But you've got to have some starting value. Let's call it 0.010" in our example, to keep the math simple.
You add the two values, and that's the distance from the fretboard to the bottom of the slot in your nut. In this example, we've got 0.055" for a final value. Select a combination of feeler gauges that add up to your number, and you're in business.
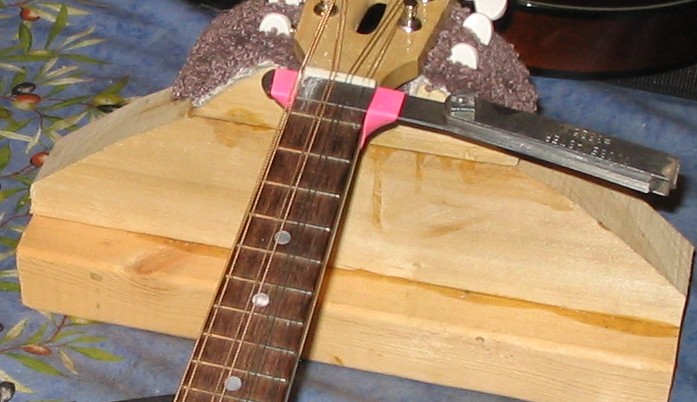
Figure one shows the combination of feeler gauges slipped under the strings at the nut, and held in place with a stout rubber band. The rubber band in the picture is what comes with the broccoli we buy at the supermarket, but feel free to substitute your own. The important thing is to make sure that the feeler-gauge stack is pressed tightly against the nut.
 |
|---|
| Figure 1: Setting the clearance for the nut slot |
Now you can cut the slot with abandon, knowing that when you arrive at the desired height, the feeler gauges will stop you cold. It's pretty much impossible to cut the slot any deeper. If you re-fit the string and find that it's still a tad high, adjust the thickness of the gauges to reduce the clearance by a thousandth (or less, if you have a blade that's 0.0005" or 0.0015" or whatever in your assortment ... and most of the feeler gauge sets have such a blade). Slip the blade stack under the strings and continue until you hit that perfect height, knowing that you won't overshoot in your fatigue or your zeal.
The only drawback to this method is that eventually your nut file rubs against the hard steel of the gauges, and that can't be good for them. I paid too much money for my nut files to be constantly risking them this way.
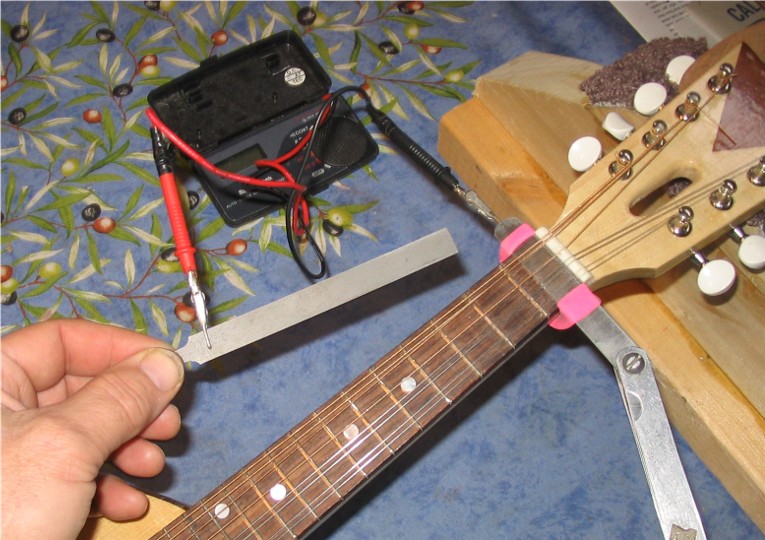
So I added a refinement to this method using a cheap continuity tester with an audio signal. I had one that I got from my father, who got it from Radio Shack. One lead of the tester is clipped to the fret file, and the other to the feeler gauges, as shown in figure two:
 |
|---|
| Figure 2: The tester attached to the string and to the nut file. |
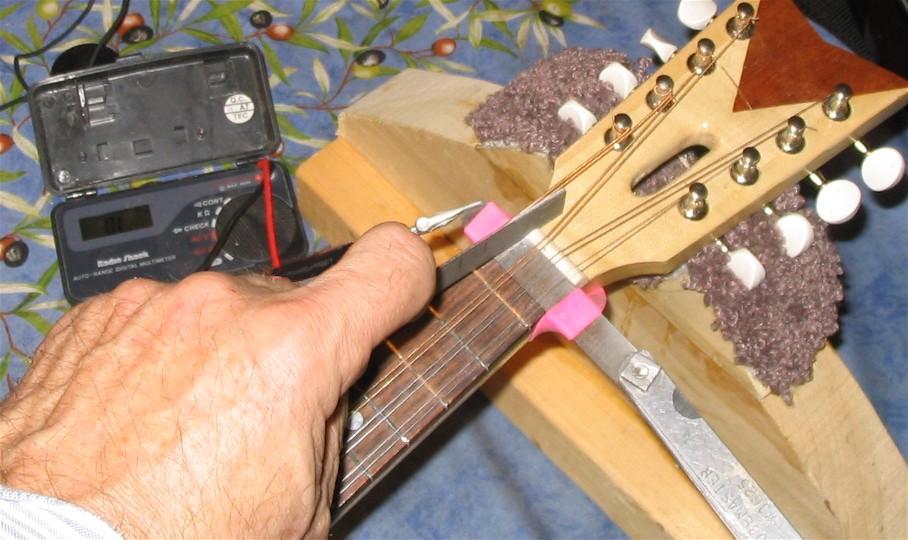
Now, when I cut the slot, I hear the tone of the tester the instant the metal file makes contact with the metal feeler gauge. At that point, I round the slot down toward the machines so the slot has a definite break at the entrance of the string to the slot. By keeping the feeler gauges in place, you ensure that that "break point" is right at the front of the slot rather than farther toward the machines, thereby eliminating that as a source of string buzz.
 |
|---|
| Figure 3: Fearlessly cutting the nut slot |
That's the technique. You don't really need the continuity tester, but it gives me great peace of mind to know that I'm not abusing the files unduly. But the tester really shines in another way.
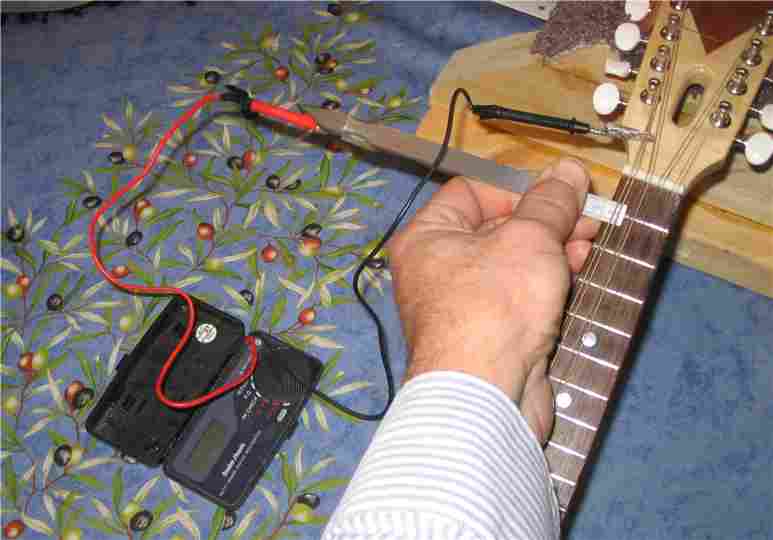
When you're measuring string clearances, the tester will tell you instantly when you're at the right clearance. I've been using a Starrett taper gauge to measure these tolerances, but any feeler gauge will work the same way. You clip one lead of the tester to the gauge, and the other end to the string (or any other string, because they're all connected via the tailpiece. When you slip the gauge under the string while pressing it against the fret, the tone will sound exactly when the gauge touches both the string and the fret. Perhaps you find that if you gently rock the gauge over the fret, you can make the tone go away. That tells you that the gauge wasn't perfectly parallel to the string. You've got an accurate measurement at the exact point where you can no longer make the tone go away when you rock the gauge over the fret.
 |
|---|
| Figure 4: Using the Tester with my Starrett gauge |
The only thing you have to be careful about is to ensure that the gauge isn't touching any of the other strings inadvertently. I have little shims of wood that I use to push the non-tested strings up and out of the way.